Saturday, 26 November 2016

DC ADOPTER


                                               DC ADOPTER USING TRANSFORMER

 I have done a DC Adopter for my embedded projects. Most of embedded system or electronics circuits/components require DC to function. Usually we get AC currents in order to operate any electronic components we need DC so here in this projects I am using a transformer to step-down the voltage from 230V after that by using a rectifier and filter I am converting the AC to DC which I am using to operate the most of the electronic components for my projects.
While I am doing this project I got few doubts and I got the answers after completing the projects ill share with you people. Let us discuss electricity generation to output usage of electricity. Basically from generating station we get the DC (if it is not alternator) then we convert it to the AC because AC transmission cost less rather than DC, AC is much easier to convert between voltages. Then you will get a doubt why we prefer DC for electronic circuits than AC .The answer is simple, mostly all electronic components are semiconductor materials in order to operate most of the semiconductor components we need continuous polarity /supply which cannot be possible with AC so we go for DC.
In order to operate any device we need to know the required voltage and how much current does it draw this is the basic point we need to keep while doing any electronic project. Here I want to mention another point some will confuse with current and voltage, if particular electronic device rated for certain voltage and current for example most of electronics components have 5v and 1amp current this means input voltage should be of 5v if input voltage is less than this then you won get required output if the input voltage is more than 5v it may damage the component. Current should be 1 amp and more but not less than 1 amp.
I hope you all understood, let us move into the project.
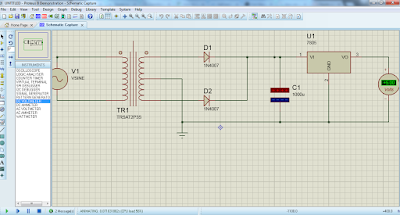
Here our task is to convert AC to DC the easiest and cheapest way is diode. Diode is the only electronic components conduct in forward region that is which allows the current in one direction. Here in this picture you can see the half bridge rectifier which oppose the flow of current in negative direction.

From the above figure we can observe more ripples (Ripple is nothing but a noise produced) in order o avoid this we have two ways
1. Highest value electrolytic capacitor
2. Full wave rectifier.
If we are going for 1st option that is capacitor .here we get a doubt how we decide the capacitor value?
Well we have a small formula
Capacitor size=current drawn / ((ripple frequency)*(ripple voltage))
Here capacitor is inversely proportional to ripple means if you want ripple to be low you need to increase the capacitor value which can be expensive after certain extent
Full bridge rectifier is the best option for AC to DC conversion. It manage to flip over the negative voltage into positive as shown below

Here we can find the ripple too in order to avoid ripples we add the capacitor to the circuit


Finally our project is done by adding the 7805 voltage regulator


we finish with simulation let us jump into practicals


Here you may get the doubt like we have designed the circuit for 12v then why it’s showing 18v sometimes 17v. the reason is transformer has some inefficiencies like it is made of coil winding some part of it acts like a resistance core of the transformer so the output always show twice as rated when we draw less that 10mA of current


My adapter is little messy with all wires I think u can see the capacitor and diodes in this picture .here I cover my diodes with protective rubber to avoid shortages.

Monday, 29 August 2016

LIGHT FOLLOWER


                                                           LIGHT FOLLOWER

The light following robot is a mobile machine which is capable of detecting and following the light source on the traveling path. It is developed without the help of a micro-controller for providing easier connections and understanding of the circuit. It requires fewer numbers of electronic components and verylcost-effective as well.
The concept of this light following robot is very simple. It includes three photo-diodes, one on the right and other on the left. When the light falls on the right LDR, the robot will move on the right side,other on left and another on front.The robot will move on the left side when the light falls on the left LDR.
Light dependent resistor sensor has been attached with the robot whose resistance varies with light intensity. When the LDR receives maximum amount of light then its resistance goes to its minimum value, ideally zero and when no light falling on the LDR then its resistance goes to its maximum value, ideally infinitive
A Light Following Robot is also an electro-mechanical device (robot) but with an added intelligence that it follows the route or decides the path to follow according to the light that falls on it. In this project we have designed this robot such that the amount of light falling on it, from every direction, will be calculated and then it will find out the direction from which the light with maximum intensity falls on it.
OK now we will look into the practical working.let start with the simulation.
As i discussed above.here i am using operational amplifier to compare the values of the LDR and potentiometer along with motor driver to drive the motors.


let us test the motor driver circuit:


we finish with the testing the motor driver circuit.lets finish the reaming circuit and test the whole circuit,as i indicated in the simulation here left motor is in left side (yellow) and right is on right side in the picture(white).  


my circuit is little messy.But its working good.you can find that in the following video.


My circuit is working good.We can fix the whole circuit on chassis and make it look like a car,robot according to your wish.


Saturday, 9 July 2016

Highway Monitoring System

         
                Highway Monitoring System

I have done a project which will monitor the highways traffic. it’s a pre-programmed system, if we install it on the highway roads, it will detects the number of cars that is passing and we can control the traffic lights and we can give some instructions to the travelers through display, it’s an embedded system that interface the computer vision to real time device like MCU, display and traffic light. We can further improve this project to detect the speed of the vehicle if vehicle exceeds the speed this system can note vehicle number and we can also monitor the toll gate etc.

Here in this project I just use the feature based cascade classifier to detect the vehicles. Haar cascade classifier is best and accurate feature based classifier to detect the particular objects, human beings, face etc.
 in this project i used the recorded video we can use the live stream video also.we need to import the classifier and need to write small logic to draw the shapes on the on the moving object that is recognized by HAAR classifier we can observe how through below image how the classifier is working here i took the rectangular shape around the detected object .
next we need to detect the vehicles and count them that are passing by the road. For that I wrote logic to find center point of the object and I draw a line on two roads so that if the center point of the vehicle passes by the line then count will increase.


Now it’s time to interface it with the MCU and operate the real time objects like traffic lights and display.

traffic lights:


adding display:

You’re always welcome to give me your valuable suggestion through comments, if you need more information regarding this please leave a comment so that I can answer you.

Tuesday, 5 July 2016

Face Detection


                            Face Detection

I have seen an article about the HAAR classifier .which inspires me to work on image processing. image processing nothing but convert the image and video to digital form, digital form to arrays by using these arrays with some logic we can perform some actions that can change the features of the image/video.
Haar classifier is the best and effective object detection method proposed by Paul Viola and Michael Jones. cascade function is  trained by positive and negative images.Haar classifier is developed using Haar wavelets  .this wave lets is similar to fourier transformations if you want to know more about the Haar wavelets and classifiers just open the links below:
With the knowledge of these we can make or train our own Haar classifier.

Here in this project I try to detect the face, eyes for which I use the existing classifier I found it when I Google about the classifier. We can use four edge detection rather than the classifier but it is not as accurate as Haar classifier and object detection not easy in four edge detection so I opt for haar classifier.

Let’s start our project:
Here i used the recorded video,we can use the live stream video also.we need to import the classifier and need to write small logic to draw shape on the feature that is recognized by haar classifier we can observe through below image how this classifier is working .


You’re always welcome to give me your valuable suggestion through comments, if you need more information regarding this please leave a comment so that I can answer you.


Sunday, 3 July 2016

Computer vision or image processing


         Computer vision or image processing

I have done a project which will recognize the moving objects using computer vision we can say image processing
In order to do this project we need to work on some examples like how to import the image/video and convert it to the digital form, digital form to arrays by using these arrays with some logic with required libraries we can perform some actions that can change the features of the image/video.
Let’s start:
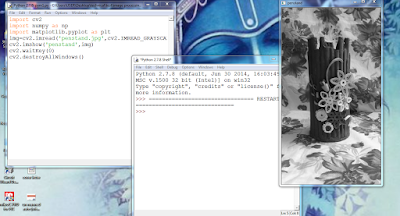
First we need to know how to import the image/video and change the color and save image/video using open CV


Next we need to know how to draw shapes and write a text on the image /video


Now we need to learn how to decrease the noise in particular frame/image. Here I am using threshold, gaus , otus. See the difference from the original image to processed images

Now we need to work on finding the edges


We can crop the image in open CV


Now we need to detect the moving object


Finally we will detect the object by using above learned topics.here i try to detect the objects by four edge detections without using any cascading .


Thursday, 23 June 2016

DATA LOGGING OF TWO DIFFERENT SENSORS


    DATA LOGGING OF TWO DIFFERENT SENSORS

I have done data logging system using MSP430G2 and Python. In this project I tried to plot the real time graph of two sensors namely LDR (light dependent resistor) and IR (infrared sensor).
Here in this project I am using matplotlib, numpy, drawnow in the place of drawnow we can use deque for plotting live graph.

In order to do this project I need to have a good knowledge of the above mentioned libraries. So ill do some experiments with these libraries
First of all I need to know how to plot the graphs and what all the command that are required to plot the graph with our specifications.

Now ill plot a simple graph using some random values that strikes my mind..!


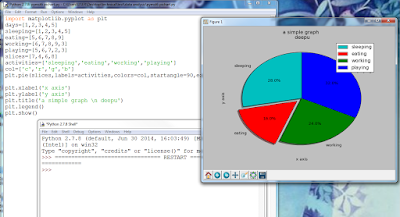
Now I’ll try all the different command that are related to graphs, bar charts, pie charts etc.


Now I’ll try to import the text file and read the 2 different values which are separated ‘delimiter’ from the text file and plot the graph.
Here ‘delimiter’ is single space


 Here ‘delimiter’ is coma “,”


K good! Now I got enough practice to draw the graph, next my task is to import the continuous serial values and plot the graph. Before that we need to fallow few step to attain that.
First of all I need to do check weather can I do any changes to my serial values.     


 It’s possible to do some changes to my serial values. My next task is to add the serial to one another of single sensor


K good now I can plot the graph with these continuous added values by using ‘drawnow’.first ill try to plot for single sensor.


data analysis of 2 sensors (LDR and IR)


here i change the plot label to there specified sensors names so that it will more understandable. 


Tuesday, 21 June 2016

SERVING ROBOT

         
                                                    SERVING ROBOT


Its a latest design  ROBOT which can be controlling using an APP for android mobile.  I had developed the remote buttons in the android app by which we can control the robot motion with them. And in which I use Bluetooth communication to interface controller and android. Controller can be interfaced to the Bluetooth module though UART protocol. According to commands received from android the robot motion can be controlled..


HAPTIC ARM


                                                               HAPTIC ARM


 In order to represent the robotic technology in the field of human-machine interaction and wireless communication for allows interactivity in real-time with virtual objects it is very necessary to develop some or the other technology that makes the maximum use of robot to help people do their work in an efficient way in their day to day life. The main objective of the project is to design and develop the Robot that is used to move using wireless system by recognizing hand motion that is controlled by haptics technology for virtual environment & human-machine systems capable of haptic interaction.Without risking human life or limb, this research has applications in many areas, Including robot- assisted surgery, simulation and training, rehabilitation, exploration of hazardous or remote environments, enabling technologies, manufacturing, design, mobile computing, and education.


NATURAL HOME AIR COLLER


                                              NATURAL HOME MADE AIR COOLER

Its a simple project.with simple science involved in it.the reason behind to do this is SUMMER!.. by which i am unable to concentrate on work .then i thought why cant i do a natural cooler which serves my purpose and harmless for nature then i did it.

it is a system which consist of a submersible pump along with two CPU fans and a cooling mesh(water observant).
Working:
ice cubes are stored inside the cooler at the bottom. one fan acts as a exhausted fan another acts as a normal fan.and it cools the surrounding when the cube melts and turns into water then submersible pump come into picture it will pumps the water to water observant nothing but a cooling mesh by which you will have more effect i.


In this picture u can have inside view of the cooler:


I have made a stand to fix the submersible pump:


After fixing the submersible pump we need to run the wires carefully for the protection.we need to be careful while doing this be caution and keep this in mind see the perfect place where there is absents of water inside the cooler and run a water resist tape on wires after fixing it for further more protection.


protect your wall in order to avoid the leakage of cooling .


finally the output :
it will decrease the temperature of the surroundings for few degrees.It can works on both AC and DC ...!don't expect this to work as a commercial cooler but it can worthy competitor,because it is good power saver,cost less to build,environmental friendly ..etc..,


Tuesday, 14 June 2016

Microcontroller interfacing with pygame


             Micro controller interfacing with pygame


In this project I have varied the size of the object according to the sensor values using pygame. It is a testing process for my project called “Game operating with sensors”. so let us see the output and working of this project.
I have divided this project into steps

Step1: First I need to download python along with pygame and pyserial library after that I need to
 import those libraries into python. After that I need to set the display height and width and color and caption


Step2: In this step I need to display the object.


Step3: Now I need to vary the size of the objects according to the sensor value


We can change the position too..


Monday, 13 June 2016

Game operating with sensors


                               Game operating with sensors


I have developed a game which can operate with sensors. For this project I choose MSP30G2 and python
In this project I have developed a game in python and I interface it with MSP430G2 to take the sensor values and according that sensor values I just operated the game which I have developed using python.
For this project we need to install pygame. Here I need to tell you people to the develop the game  we need to have a good knowledge of logic, mathematics, programmng skills,etc. it’s a fun topic to develop game that to with our own logic isn’t it great then let us begin!
I will try to do my project in step wise

Step1: First I need to download python along with pygame and pyserial library after that I need to import those libraries into python. After that I need to set the display height and width and color and caption

Step2: Here in this step I draw the character which plays a major role in my game. As I am developing the snake game I will draw the rectangle for my snake and circle as a food for my snake.


Step3: This is the major step for entire project  i.e.,in this step my task is to move the snake according the sensor value which I am sending throw MSP430G2.


Step4: In this step I will add some rule like boundaries when my snake touches the edges of the screen the screen has to display warning


Step5: We finish with snake part now I will concentrate on food after eating the food snake has to be doubled along with we need to produce more food at random position, For this I imported random library.

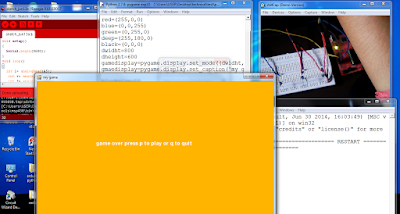
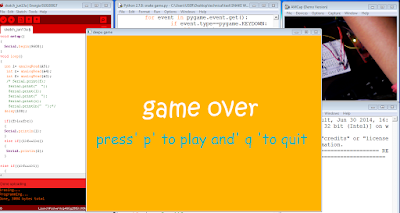
Step6: Finally I need to decorate my game by adding “start screen” , “end screen” ,“pause screen” and I need to add the images of  snakehead ,apple and game icon


I have developed other games in the same way with slight difference in the logic.


I need to work more on this project because I am facing the problem while moving snake/car around using sensors may be i need to prefer more accurate sensors and i need to change some part of logic too even though it a successes for certain extent thought of sharing it with you people it may help some or the other for their project..!
But I am happy to tell you it’s working by using keyboard I will share you the executable files for windows installer with you  so that you can download it and enjoy the game..!

 How to install these games:
Step 1: download the folder and click on setup file install it

Step 2: After installing it go to the> program files(x86) as shown in the above figure>there you will find the folder called deepu game folder for snake  and racer folder for racer game as in t


 Step 3(for snake game): Now open the folder there you will find the snake game file as shown in the below picture. double click on it your game will run
 Step 3(for racer): Now open the folder ther you will find the snake game file as shown in the below picture. double click on it your game will run


finally you will get the game.play according to the instruction and enjoy..


 You’re always welcome to give me your valuable suggestion , if you need more information regarding this project please leave a comment so that I can answer you.